Showing posts with label orchid. Show all posts

Friday, 25 January 2013

Growing Brassavola Orchids

I will admit that I'm biased: I'm a Brassavola enthusiast. For one thing—and perhaps the most important thing—B. nodosa possesses my favorite fragrance in the world. You can have your roses and gardenias, your citrus flowers and even your night-blooming jasmine. Give me the haunting scent of a B. nodosa any night. Perhaps even more bewitching, these pure white, ghostly flowers only give up their scent at night, as if it was a secret pleasure they are afraid to flaunt during the day. And that, of course, is not where their virtues end. The Brassavola orchids are frequent bloomers, with multiple flushes of flowers every year. In some cases, they seem to bloom year-round, and what their flowers give away in size (they're relatively small compared to the more showy Cattleya and Phalaenopsis), they make up for in sheer quantity. Finally, these are not especially challenging orchids to grow—if you can grow any of the epiphytic orchids with success, you can grow these.

Taxonomy and Structure:

Brassavola orchids belong to the Laeliinae subtribe. There are about 17 species of Brassavola; they are native to the American tropics. The standard and most common Brassavola is the Brassavola nodosa, which grows readily in baskets, mounted, or in containers with orchid mix. Brassavola orchids have long, thin tubular leaves that can reach up to a foot in length and sometimes appear unrolled or flattened. Brassavola orchids and their hybrids have much smaller pseudobulbs than other epiphytic orchids, so the leaves often appear to arise directly from the rhizome without an thick pseudobulb. The typical Brassavola flower features an enlarged, scoop-like lip with petals and sepals that have narrowed into spear-like petals. Brassavola nodosa flowers are white to attract moth pollinators, but the plant has been extensively hybridized to create flowers in a multitude of colors.

Light:

Brassavola orchids typically light fairly strong, bright light, even with some direct sunlight. A healthy Brassavola has mottled leaves, with slight reddish marks on the leaves. Leaves that are deep green typically signify a plant that isn't getting enough light, so the plant should be moved to a brighter location. Brassavola prefer 2,500 to 4,000 fc light intensity. A south-facing window is frequently a perfect home.

Water:

The tubular leaves on Brassavola are designed to reduce water transpiration, making them more drought tolerant than many other orchids. As a result, the plants need less humidity and less frequent water than many other epiphytic orchids. As with all orchids, the frequency of watering depends on your growing culture. Mounted Brassavola orchids can be watered several times a week during the growing cycle, while potted Brassavola orchids should be watered thoroughly weekly. Drooping or wrinkled leaves signal water stress and you should water the plant as soon as possible.

Fertilizer:

Brassavola orchids send out several flushes of leaves throughout the year and healthy plants are year-round bloomers. As a result, the plant should be fed throughout the year with a weak fertilizer solution (1/4 strength weekly). Many growers fashion "fertilizer balls" from nylon hose and controlled-release pellets, then tie the ball of pellets over the plant, thus providing a small dose of fertilizer every time the plant is watered. Nylon fertilizer balls will last a few months.

Temperature:

Brassavola prefer intermediate to warm temperatures and will bloom better on the warmer end of the scale. Nothing smells as wonderful as a blooming Brassavola on a summer's night.

Blooming:

Brassavola orchids are moth-pollinated, so the flowers on the Brassavola nodosa are a pale white to attract pollinators. Brassavola orchids are year-round bloomers with multiple flowers and flower spikes per flush. It's not uncommon to see a Brassavola so covered with flowers it looks like a flower ball. Provide adequate light and warmth and you will be rewarded with several full blooms throughout the year. Brassavola are related to Cattleya and Rhyncholaelia, so they have been extensively hybridized to create many new species, including the lovely and common Brassolaeliocattleya orchids or BLC. A personal favorite of mine is the Stellamizutaara Kelly 'Lea,' a complex hybrid arising from a cross between the Brassavola nodosa and the Cattleytonia 'Keith Roth'.

Potting and Media:

Brassavola adapt well to mounted culture and will thrive mounted on fern plaques or in mounted baskets. Basket-grown Brassavola can quickly outgrow their original basket and form a specimen plant that completely covers the original container. Don't bother repotting or remounting larger Brassavola, but feel free to take divisions and rapidly multiply your plant stock. If you're potting them in containers, use a standard fast-draining orchid mix, such as those composed of expanded clay pellets, charcoal and pine bark chips.

Grower's Tips:

Brassavola are generally a beginner's level orchid in terms of their difficulty to grow. This is mainly because they are more drought tolerant than many species and can handle more neglect than fussier species (vandas, I'm looking at you). Unfortunately, for such an easy orchid with so many great attributes, they are woefully under-represented in the mainstream orchid trade. Look for Brassavola orchids at specialty greenhouses, orchid shows or consider purchasing them online. Brassavola are fast-growing orchids and will quickly begin to yield divisions to increase your collection or make your orchid-loving friends very happy.

Thursday, 24 January 2013

 The Ascocentrum genus is a relatively small group of about 10 species that hails from the Asian tropics—yet from a collector's point of view, these are extremely important plants. Ascocentrum plants are closely related to Vandas and easily hybridize with these orchids. The resulting Ascocentrum x Vanda cross is known as Ascocenda, or Ascda. The Ascocenda plants offer the very best of both their parents: they are compact monopodial plants that can easily be grown indoors; they have the same outrageously awesome growth habit; and they boast the jewel-like flowers of the Vandas. If you have any interest in growing hanging monopodial orchids, my advice is to start with an Ascocenda. Once you've mastered these plants, you can move up to the much larger Vanda plants.

Taxonomy and Structure:

Ascocentrum are in the Vandeae tribe and Sarcanthinae subtribe of orchids. They are close related to Vandas and Renantheras and easily hybridize with these plants. Ascocentrum are monopodial orchids, like Phalaenopsis, meaning they lack pseudobulbs and grow from a single stem, with their roots emerging from the bottom of the growing stem. Ascocentrum have strap-like leaves that emerge alternating left and right. Their roots emerge from the bottom of the stem, but sometimes roots will emerge from between leaves and wander into the open air. Over time, older plants will branch, sending out alternate stems, and gradually increasing the plant's overall size. Propagation by division is possible by removing side stems, providing they have at least two healthy roots established.

Light:

Like Vandas, Ascocentrum thrive in strong, bright light. They can be acclimated to direct sunlight, and in areas where they are grown outside, can sometimes be seen in nearly full morning sunlight. Plants that are receiving enough light have light green leaves with red mottling on the leaves. Leaves that are dark green or a lack of flowering typically indicate inadequate light. In northern latitudes, the winter is particularly challenging when it comes to light. Growers in these areas might need to supplement with an HID light. In the summer, your Ascocentrum might appreciate being hung in a tree outside.

Water:

As with all orchids, the amount and frequency of watering depends on the growing habit. Ascocentrum orchids can be grown in pots, in a very fast-draining orchid mixture, or they are particularly well suited to basket culture. Many growers who have greenhouses grow Vandaceous orchids in open slatted baskets with no growing medium and the roots hanging free in the open air. In general, Ascocentrum have fairly high water requirements. Hanging plants should be watered or misted daily. To correctly water a hanging Ascocentrum, give it a good soaking, then let it dry for two or three minutes and water it again. The roots should turn green or silvery as the plant absorbs water. Providing adequate humidity is also important: a minimum of 60% is necessary for healthy growth, but more is better. There is no upper tolerance—these orchids are well suited to 90% humidity, providing there is a strong airflow. A healthy plant should remain cloaked with leaves all the way to the bottom of the stem. If the plant starts dropping leaves, the most likely culprit is lack of water or improper feeding.

Fertilizer:

Ascocentrum are heavy feeders. Fertilize weekly with a 1/2 strength orchid fertilizer. Plants that are properly fertilized will retain their leaves and bloom much more vigorously.

Temperature:

Ascocentrum are warm-house orchids that prefer temperatures above about 65˚F. They can tolerate lower temperatures, but a prolonged exposure to colder temperatures will have a profound effect on the plant's growth and flowering. Exposure to any temperatures below 50˚F can cause delayed flowering for up to a year.

Blooming:

The plants typically flower in the late winter or early spring, although my Ascocenda hybrids have been known to throw flower spikes throughout the year. The plants flower from an upright inflorescence that is covered with small, perfectly shaped flowers. Ascocendas follow this same pattern: an upright inflorescence that looks like a cone of flowers. True Ascocentrum flowers are often red, scarlet or deep orange, depending on the species.

Potting and Media:

Ascocentrum and the closely related Asocendas really do best as mounted plants. Most growers prefer growing them in open slatted baskets, wiring the plants into place until the roots have had a chance to work their way through the basket and firmly hold the plant in place. As they plants grow, they sometimes need additional support to prevent tipping over; this can be provided by wiring the main stem loosely to the basket support. Plants grown in this way will eventually develop a hanging curtain of white roots. People who are unfamiliar with orchids are always enchanted by the sight of a beautiful orchid seemingly growing in mid-air (not knowing, of course, that you water it daily!). Baskets can be made from cedar or plastic. You can also grow these plants in containers, but it is absolutely essential that you use a very fast draining mix and allow the plants to completely dry between watering. Despite their extremely high water requirements, dampness is the enemy of these beautiful plants. The roots must be allowed to completely dry out.

Grower's Tips:

Ascocentrum and indeed all Vandaceous orchids are not really beginniner's plant. They require more maintanence than your average Phalaenopsis, including sometimes daily watering and rather more extreme growing conditions (high humidity, high temperatures, very bright light). Additionally, I've found that growing them well requires some patience in the beginning—there is a natural balance between watering, humidity, temperature, air flow, and light that is optimal. It's hard to say exactly what this is, because every growing situation differs a little bit. To some degree, it's just a matter of feeling it out, learning to recognize this sweet spot by instinct as much as anything else. But don't let me discourage you: there's a reason this plants win so many awards, a reason that people literally build additions onto their homes to keep Vandaceous orchids. They are exotic and beautiful and tempermental, and they reward your efforts with sublime displays of blooms.

Wednesday, 23 January 2013

Achimenes—Growing Cupid's Bow Flowers

Achimenes are a delightful relative of the African violet. They grow from small underground rhizomes that sprout in the late winter/early spring and eventually explode in a variety of lush blooms. Today, breeders have worked extensively with the plant to create wonderful blossom colors, including white, pink and purple. These are warm-sill plants that dislike direct sunlight, but crave warm and moist homes. After the bloom is done in the late summer, the plant will begin to die back and you can overwinter the rhizome in dry peat moss until it's ready to be planted in fresh soil again near the end of the winter and the cycle starts over again. Some varieties make excellent hanging plants.

Growing Conditions:

Light: Achimenes prefer bright, but not direct sunlight. Strong sunlight will burn their leaves.
Water: Begin watering the freshly planted rhizomes in late winter until new sprouts emerge. After that, and throughout the growing season, keep the soil continuously moist as the plant grows. When it begins to die back in the fall, reduce watering until it's died completely, then suspend watering and keep the rhizome in a cool, dry place.
Soil: A rich, fast-draining potting mix is ideal.
Fertilizer: During the growing season, fertilize every week with a weak liquid fertilizer. It also works to include controlled-release fertilizer pellets in the soil.

Propagation:

There are two ways to propagate Achimenes. First, you can root stem-tip cuttings in the early spring, when the plant has gained enough mass that it won't miss a few cuttings. Use a rooting hormone and keep them in a warm, bright place until they begin to grow. The second method is by rhizome division, which is usually carried out in the winter, just before you begin to feed and water the plant again. Divide larger rhizomes in half.

Repotting:

Every spring, the rhizome should be planted in a fresh pot of potting soil. They prefer a nonalkaline soil, so a peat-based mixture (which tends to be slightly acidic) is perfect. At the end of the growing season, remove the plant from its old pot and place the old rhizome in a fresh bag of dry potting mix. Keep it at around 50˚F for the remainder of the winter until it's time to pot it out again.

Varieties:

The vast majority of the Achimenes on the market today are carefully hybridized plants that were bred for the color of their blooms. There are both cascading and upright versions, so make sure the one you're buying fits your needs. Some of the more popular Achimenes varietals include:
  • Ambroise Verschaffelt, which is white with violet petal veins.
  • Charm, which features pink flowers.
  • Blue Monarch, which has blue flowers.
There are also a few species variations available, including the A. erecta, which stays under two feet and grows upright with red blooms; A. grandiflora, which grows to two feet with purplish flowers; and A. longiflora, a compact specimen that stays about a foot tall.

Grower's Tips:

There are not difficult plants to grow and offer beautiful, seasonal blooms. To encourage bushy plants with more blooms, pinch off the growing tips as the plant grows in the springtime—you'll be rewarded with richer displays of blooms. Fertilization is important for these plants: use a high-phosphorous fertilizer to get the best results and feed continuously throughout the season in small doses. When it comes time to pot up the year's rhizomes, make sure to discard any rhizomes that have dried out or become shriveled. These are unlikely to sprout and will only disappoint. Finally, be aware that these plants are vulnerable to aphids and thrips.

Oncidium Orchids

Oncidiums are popular indoor and florist orchids for a very good reason: their large sprays of flowers often sag with dozens of blooms. There are actually several hundred recognized oncidium species, but the naming isn't stable, so there is considerable flux as experts reclassify plants. Additionally, they have been freely hybridized. The most common oncidium grow well under normal indoor conditions. They have large pseudobulbs that arise from a mass of thin white roots. The large leaves (up to 2 ft.) emerge from the pseubobulbs. They flower in fall.

Light:

I find that oncidiums are much more forgiving of bright, even direct, light than other popular orchids, especially the phalaenopsis. Oncidiums can handle direct morning light and prefer bright to very bright conditions. They tend to enjoy the same light I give dendrobiums.

Water:

During the growing season, water daily or every other day. Be careful, though, because drainage is an absolute priority, and the potting media must be perfectly free draining. The plants can also be grown on slabs or in baskets. Because oncidiums have large, fleshy pseubobulbs and masses of roots, they are very prone to rot. If you see a psuedobulb beginning to rot, cut it out with sterile snippers and reduce the amount of water. In the winter, reduce watering to bimonthly or less. They can withstand considerable drought because of their large pseudobulbs. Wrinkled pseudobulbs generally indicate lack of water.

Fertilizer:

During the growing season, feed with a weak orchid fertilizer bimonthly or scatter slow-release pellets in the growing media at the beginning of the season. Although there are many species, in general, the larger the plant, the more heavily it will feed.

Temperature:

Oncidiums can be found in many habitats, from semiarid subtropical lowlands to cool and misty cloud forests. Generally, the most popular oncidiums, which feature small yellow flowers, large pseudobulbs and strappy leaves, are intermediate to warm orchids. Do not expose them to cold drafts or tempatures below about 50. Even temps in the mid-50s will cause the plant to slow its growth if they last too long.

Blooming:

Oncidiums are magnificent in bloom. A large, well-grown plant might send out six or seven branched sprays of yellow flowers. The effect is very much like a cloud of buttery butterflies. The most popular species include O. leucochilum, O. longipes, O. sarcodes, O. pulchellum, as well as many hybrids. Although oncidiums are known for their yellow flowers, other varieties are available. The O. Sharry Baby is sometimes called the chocolate orchid for its sprays of brownish flowers with a rich cocoa scent.

Potting and Repotting:

Oncidiums like to be slightly underpotted in a very free-draining bark-based potting media. Many of the oncidiums will form large clumps of pseudobulbs and develop into rather large plants. They can be easily divided into clumps when repotting. Just make sure you have at least three pseudobulbs in each division. In general, only repot when necessary.

Grower's Tips:

Like many orchids, once an oncidium has adjusted to its conditions, they're not difficult plants to grow. My greatest success with these plants has come almost by accident: I inherited a very large one and didn't really have room for it, so I stuck it in the corner of my collection and essentially forgot about it. That fall, I was rewarded with a profusion of blooms. Since then, I've enthusiastically grown oncidium. Watch your water to avoid rot, make sure the big plants are fed well, give it lots of light, and your oncidium will produce.

Cymbidium Orchids

 Cymbidiums have been making a much-deserved comeback in recent years as more people discover these wonderful orchids. They are much more cold-tolerant than many common species of orchids and feature sprays of large blooms in the dead of winter. Much of the new interest in cymbidiums is driven by the appearance of the miniature cymbidiums. These plants are smaller and more manageable than the earlier varieties.

Light:

During the growing season, cymbidiums appreciate dappled sunlight, or about 50 percent shade. They can be moved outdoors in the summer, providing they are not put into direct sunlight. A few hours of weak morning sunlight and shady afternoons is perfect. Move the cymbidiums outside after the threat of frost has passed. If you're growing them indoors, a southeast or east window is perfect. Your leaves should be apple green, as opposed to dark green. A dark green plant is likely not receiving enough sunlight to provoke a good bloom.

Water:

Copious water during the growing season (spring, summer and fall). The purer the water, the better the plants. Accumulated salts in tap water can damage the plants, so make sure they are well flushed every time you water the plant. During the winter bloom, reduce watering dramatically, but don't let the plant dry out. Keep the potting media slightly damp to the finger. Plants that are affected by the salt build-up in tap water will exhibit leaf-tip dieback, a condition in which the leaf tips turn black and die.

Fertilizer:

During the growing season, feed with a weak orchid fertilizer bimonthly or scatter slow-release pellets in the growing media at the beginning of the season. Be careful to avoid a high nitrogen fertilizer as this will cause rapid foliage growth at the expense of the bloom.

Temperature:

Cymbidiums are considerably more cold tolerant than some other popular orchids. The large, older cymbidiums need an extended period of cold to provoke a bloom, while the miniatures aren't quite as dependent on cold weather to bloom. Cymbidiums have been known to briefly withstand freezing temperatures, although frost will kill them. Nights down to 40ºF are fine. On the other side, cymbidiums can also withstand considerably summer heat without wilting, as they are suited to the temperate regions of Asia where there is considerable variation in seasonal and day/night temperatures.

Blooming:

The cymbidium bloom is triggered by a combination of falling temperatures and reduced water. The miniatures have generally been crossed with warm-house orchids, so they aren't quite as dependent on cold weather to bloom, but it's still an important part of cymbidium culture. The natural bloom season is during the winter, when your plants should be indoors and available for display. Cymbidium flowers grow in sprays, with spikes arising from new pseudobulbs every season.

Potting and repotting:

Cymbidiums are semi-terrestrial orchids. They naturally grown in loamy humus, sending thin roots into the mixture. Thus, they are perfectly suited to the conditions most easily provided at home: a rich, loose, organic potting mixture. Most growers recommend using fir bark, perlite, peat moss, and other loose organic material in some combination. A commercial paphiopedilum mix will usually serve these plants well. Cymbidiums can be easily divided during repotting in the spring.

Grower's Tips:

Cymbidiums are wonderful orchids to grow in the middle and coastal regions of the United States and other temperate countries. They can be grown outside during the spring, summer and fall, and moved back inside at the first threat of frost. During the summer, they will grow quickly, sending up new pseudobulbs topped with long, strappy leaves. The flowers are on display during the winter months. A well-grown cymbidium is resistant to most insects, but as with all orchids, there is some risk of aphids, scale and other insects. Treat with standard products, always following label directions.

Dendrobium Orchids

Native to Southeast Asia, the genus dendrobium is one of the largest of all orchid groups. There are about 1,200 individual species, and they grow in all manner of climates, from hot, wet lowlands to high-altitude, colder mountains. Growers usually divide dendrobiums into groups based on their growing conditions. All dendrobiums are epiphytes. Some are deciduous and some hold onto their leaves all year round. Serious collectors often favor the D. nobile, but the most common kind of dendrobium—the kind gracing grocery store shelves—is a hybrid dendrobium phalaenopsis. This article will focus on those plants.

Light:

These plants like strong, natural sunlight. They will grow in lower light conditions, but it is unlikely the plant will bloom well. The appearance of tiny plantlets on older canes (called keikis) often means the plant isn't getting enough light. These keikis can be potted up individually after they develop roots.

Water:

During the growing season, dendrobiums like high humidity and lots of water. As with all orchids, the frequency of watering depends on your growing conditions, but at least weekly is a good idea during the summer. After the growing season, cut water back somewhat (maybe every ten days), but do not suspend watering.

Fertilizer:

Feed heavily during the growing season with a weak fertilizer solution containing lots of nitrogen, or use a balanced fertilizer like Peters 20-20-20 at quarter strength with every watering. At the end of the growing season, reduce fertilizer by about half to help provoke a better bloom.

Temperature:

There are considered warm-house plants by growers, meaning they favor conditions in a warm greenhouse. The temperature for these plants should be above 60 degrees at all times, although experience has shown they can withstand a few nights down to 50 or so. But this should be avoided if possible. A slight drop in nighttime temperature will often stimulate a bloom.

Blooming:

These bloom for me throughout the year, depending on conditions. To help provoke a flower spike, slightly drop the water and nighttime temperature. Also, if a cane loses all its leaves, don't cut it off—they sometimes bloom from old canes. The flowers are long-lasting, up to six weeks.

Potting and repotting:

These are naturally epiphytic orchids that will thrive in hanging baskets with little or no potting media (in superb conditions), or they will do well in fast-draining media as a windowsill plant. These plants are shipped in quantity from Hawaii, Taiwan and throughout Asia, and some growers have started selling them grown in wood chunks. This is my least favorite potting situation because the plants are often top heavy and the wood gradually rots away. I prefer a mixture of clay aggregate, perlite, and coconut fiber. Repot at the beginning of the growing season when necessary.

Grower's Tips:

I was initially confounded by these plants. I had several, and killed many, and could never coax them to bloom. I soon figured out my mistake: I was treating them like phalaenopsis. With the dendrobium phalaenopsis hybrids, think more of everything: more light, more water and more fertilizer. They are robust growers that send up at least one new upright can every year from creeping rhizomes. Don't cut off old canes as they will sometimes flower or produce keikis that can be potted up on their own.

cattleya hybrid orchid

The cattleya group is known for large, showy and sometimes fragrant flowers. Some of the most stunning orchids in cultivation are cattleyas, with huge flowers that can measure eight inches across and come in a wide variety of colors and patterns. In the wild, there are several dozen species of cattleya, but it's unlikely you'll find any of these at local garden centers. Because of their ease of growth and sheer beauty, cattleyas are the most hybridized of all orchids, and there are thousands upon thousands of registered hybrids. When shopping for a cattleya, consider an American Orchid Society–awarded clone.

Light:

The cattleya orchids like bright light. They can even be acclimated to some direct sunlight, although keep from direct summer sunlight. They will not flower without plenty of light. In the right light conditions, the leaves will be apple green. Darker leaves might indicate too little light, while yellow or brown leaves might indicate too much direct sunlight.

Water:

Cattleya are sympodial orchids that grow from an underground rhizome. They typically send up new pseudobulbs in the spring. During the growing season, water heavily, but do not allow them to sit in water. Cut water back when the flowers begin to emerge from their sheaths--water in these sheaths will rot the immature flowers. A well-watered cattleya will have fat lead pseudobulbs.

Fertilizer:

During the growing season, fertilize with a weak orchid fertilizer weekly (weakly weekly, as the growers say). During the rest period, fertilizer every other week.

Blooming:

Most cattleya produce one new flush of growth annually, and each new pseudobulb should produce flowers that same growing season, often in late summer or winter. Some of the hybrids might produce two blooms annually. When a plant goes into flower, reduce watering to avoid accidentally rotting the flowers. Emerging cattleya flowers are protected by a thin sheath that emerges from the center of the leaf.

Potting and repotting:

Cattleya grow by means of a branching, creeping rhizome with thick, clinging roots. Repotting is stressful, and a plant will usually take a season to recover, so only repot when necessary. They will do well in most orchid mixes, including pink bark, clay pellets, perlite, charcoal, or any well-draining medium. When repotting a cattleya, make sure there is enough room for the rhizome to produce at least two new pseudobulbs before it hits the edge of the pot. Typically, repotting is done in spring, at the beginning of the growing season. Cattleya can also be slab-mounted on tree fern or logs.

Grower's Tips:

Cattleya are not difficult plants, and their flowers are incredibly rewarding. Depending on the species, they may produce just a few showy flowers or bunches of smaller, waxy flowers. Not all cattleya flowers are fragrant, so ask your grower if that's a priority. The biggest mistake most people make with cattleyas is not supplying enough light for the plant to bloom well and/or overwatering. Watch the pseudobulbs—a plump lead pseudobulb indicates a well-hydrated plant.

Phalaenopsis Orchids

Most people are introduced to orchids through phalaenopsis orchids. These are the thick-leaved plants with elegant, arching sprays of blooms that can be seen in so many design magazines and sitting on coffee tables across America. There are about 60 true species of phalaenopsis; they are native to tropical Asian countries including the Philippines, Borneo, Java and elsewhere. These plants have been extensively hybridized, and there are thousands of phalaenopsis hybrids, ranging from the stark, classic white hybrid (often called a moth orchid) to jewel-like miniatures with clouds of yellow and candy pink blooms.

Light:

Phalaenopsis are low-light orchids and will thrive in a east window, or a shaded southerly or westerly exposure. They do not like direct sunlight and will scorch. They also will do well under common grow lights, positioned about a foot off the plant. A well-grown phal will have darker green leaves on top and streaks of red or burgundy on the undersides.

Water:

The phalaenopsis is a monopodial orchid that grows from a single stem. It does not have the large water-storing pseudobulbs found on sympodial orchids, although its leaves can store some water. Thus, the plant has a lower tolerance for drought. During the growth season, water the plant whenever its exposed roots turn silvery white, usually weekly. Try to keep the potting media slightly damp. During the flowering season, you can cut the water back to every other week. The higher the humidity, the more important it is to maintain a good air flow around the roots and leaves. See Grower's Tips for watering advice.

Fertilizer:

During the growing season, fertilize with a weak orchid fertilizer weekly (weakly weekly, as the growers say). Cut fertilizer back to once a month during the winter and flowering season. Some growers like to give the plant a boost of blooming fertilizer in September or October to provoke a flower spike.

Temperature:

Generally, phalaenopsis are considered a warm-house plant. During active growth, they like temperatures between about 75 and 85 degrees, but they can adapt to a normal house temperature of 65 to 70 degrees. The higher the temperature, the greater the plant's need for humidity. However, they also like a nice contrast between night and day temperatures. See Blooming below for temperature tips.

Blooming:

Phalaenopsis typically bloom in the late winter or early spring. Their long-lasting flowers are held on arching branches and open successively. A single multi-branching flower spike can have more than 20 flowers. Individual phalaenopsis flowers can last for weeks. To induce a flower spike, the plant needs a few cooler nights, down to 55 degrees. The plants will not bloom well without this temperature contrast.

Potting and media:

Phalaenopsis can be grown in most orchid potting media, including chunks of pine bark, clay aggregate pellets, charcoal, perlite, sphagnum moss, and styrofoam. They can also be grown in hanging baskets or mounted on slabs in a greenhouse-type environment. As with all epiphytic orchids, they should be planted in free-draining containers. Repot phalaenopsis in spring, after the bloom is done. Adult phalaenopsis can often go for two years or more before they need to be repotted.

Grower's Tips:

Phalaenopsis are generally very rewarding plants. They are not demanding and, in the right conditions, they will reward the grower with months of showy blooms. It is vitally important, however, that water never be allowed to rest in the growing tip of the plant. This will cause the new leaves to rot, and the plant will die. Thus, they should only be watered in the morning. As with all orchids, the higher the humidity and temperature, the greater the need for turbulent air flow to prevent rot, fungus and diseases. Successful growth means finding the right balance between humidity, temperature, light and air flow.

Repotting your orchids is one of the most important steps you can take for growing and blooming healthy plants. Ideally, you should repot before there's a problem—but don't do it too early! Repotting should be done in spring, just before the plants' growing season begins. And don't repot a blooming plant if you can help it! Done correctly, repotting shouldn't stress your plants, but set them up for a successful growing season and even better blooms. So, as you're repotting, just remember: cleanliness is key, orchids are tougher than you think, and remember to match your media to your moisture.
Difficulty: Average
Time Required: 10-15 minutes

Here's How:

  1. Assess the Situation. Do I really need to repot? This is a key question. You need to repot if:
    • The plant has clearly overgrown the pot, with exposed roots hanging over the edges of the pot.
    • The plant has grown too top-heavy for the available pot and it keeps falling over.
    • The potting media has disintegrated into mush, which can harbor deadly bacteria and fungus.
    If any of these conditions are present, it's time to repot.
  2. Pick Your Pot. There are many ways to grow an orchid. You can mount them on slabs of wood or tree fern, you can grow them in plastic or clay pots, you can grow them in hanging baskets, and some kinds you can simply hang from a wire in the air. Unless you have a greenhouse or conservatory, it's easiest to grow them in pots. Orchid pots have slitted sides to allow for good drainage. There are plastic net pots available, and I use them for very small orchids. However, in general, I prefer the heavy clay pots, which are heavy enough to stay upright and retain just a tiny bit of moisture.
  3. Pick Your Potting Mix. Potting media is a controversial subject among orchid growers, and many dedicated growers insist on mixing up their own with ingredients like coconut husk, clay pellets, bark, tree fern, perlite, styrofoam, vermiculite, sphagnum moss and more. Whatever mix you use, these should be your guiding principles:
    • Organic mixes decay faster. If you use pine fir bark (commonly available in most commercial mixes), it will decay within a year or so of adequate watering.
    • Your mix must match your watering. If you water daily, choose a free draining mix that won't hold water.
  4. Gently take the plant from its old pot. Remove your plant from its old pot as kindly as possible. Roots will often have adhered to the pot sides, and you might break a root or two. It probably won't kill the plant, but try not to. Once you've got the plant free, inspect the roots carefully. Cut away and dead and blackened roots with sterile snippers and gently, with your finger, remove any rotted potting media.
  5. Divide the Plant if Necessary. Sympodial orchids, or those that grow from advancing pseudobulbs, can be divided at repotting. Keep at least three pseudobulbs on either side of your cut, and make sure there are healthy roots in both divisions. Cut the stem with sterilized snippers and plant each half individually. Some orchids with very small roots, such as oncidiums, can be teased apart into two individual clumps. Division of phalaenopsis is rarely possible unless the mother plant has produced plantlets on the stem of a flower (called a keikis).
  6. Prepare the Pot. Drainage is essential. If you don't want to fill up the pot with expensive orchid potting media, you can add broken clay pots or even styrofoam packing peanuts to the bottom of the new pot.
  7. Position the Plant. Orchids aren't like terrestrial plants: they aren't packed in dirt. To position your orchid, balance it on potting media gently so the top of the plant is level or slightly above the rim of the new pot. Gently fill in around the orchid with more potting media. I frequently rely on orchid clips to hold a newly potted in place until the roots grow enough to anchor it in place. If you don't have an orchid clip, that's OK, but be aware that the plant is not stable in its new home until new roots have grown.
  8. Water Thoroughly. Your newly potted orchid will need some TLC for a while, until new roots begin to emerge and the plant goes into active growth. I have found that some orchids will fail to bloom the year after they are repotted. This is OK. Orchid growing forces patience, and oftentimes, the plant will be more vigorous than ever once it has become established in its new pot.

What You Need

  • Orchid potting media
  • Orchid pot
  • Sterilized snippers
  • Styrofoam peanuts or broken pot shards
 The difference between a merely good orchid and a spectacular specimen plant is usually fertilizer.
Like any other plant, orchids need fertilizer to thrive. It's true that they need less than most other plants—and too much fertilizer can quickly burn an orchid’s sensitive roots—but there is no doubt that well-fed orchids are healthier, hold their leaves longer and bear more flowers.
Here are the basics when it comes to fertilizing your orchid collection.
  • Use a high-quality fertilizer. There are lots of opinions on which fertilizer is the best, and a whole industry has sprung up to sell specialized orchid foods. You can quickly get lost in the advanced chemistry of various fertilizer claims. But here's the skinny: one nitrogen molecule is very much like another nitrogen molecule. In fact, the quality of your water matters more than your brand of fertilizer. So when it comes to fertilizer, buy a high-quality, balanced fertilizer that contains the three major elements (nitrogen, phosphorus and potassium), plus all the minor nutrients (sulfur, calcium, magnesium, iron, manganese, boron, copper, zinc, molybdenum, and chlorine). I also recommend a low-urea or urea-free fertilizer because urea is not a truly available source of nitrogen for epiphytic orchids.
  • Weekly, weakly. This is an old rule of thumb among orchid growers: "Water weekly, weakly." You can judge the strength of a commercial fertilizer by the concentration of the major nutrients. (Click on Fertilizer Basics for a more complete description.) In general, however, you'll probably be safe using a standard 20-20-20 fertilizer at quarter strength, and a 10-10-10 fertilizer at half strength. Follow the label directions on specialty orchid fertilizers.
  • Don't Overfeed! Overfeeding will not benefit your plants. Synthetic fertilizers contain mineral salts, such as potassium, calcium and others. Over time, these salts build up in your pot and potting medium and can seriously harm the plant. Additionally, overfed orchids often grow too quickly, making them weak and susceptible to disease. Finally, many kinds of orchids actually bloom worse if they're overfed. Find the fine line and stick with it.
  • Feed during the growing season. Many orchids—dendrobiums, for example—go into dormancy over the winter months. Others, such as cattleya, slow way down in their growth. There is little purpose in feeding a dormant plant. Start fertilizing again once the plant shows signs of fresh growth in the spring.
  • To bloom-boost or not? It's increasingly easy to find specialized bloom-boosters that offer slightly different nutrient balances or micronutrients designed to enhance orchid flowering. These are tempting, but unless you're a professional grower, there's little benefit to these products. First, most home orchid collections carry multiple genera that flower at different times of the year. Second, different genera have different flowering requirements. When you get down to it, a high-quality, well-balanced fertilizer is just as effective at producing blooms as a booster, and it will benefit all your plants, not just the bloomers.

Watering Orchids

Improperly watering orchids is probably the cause of more orchid deaths than any other reason. Watering orchids is not complicated—there is no secret handshake, no lunar cycles involved—but it does require a different mindset than watering regular houseplants. And it requires a basic understanding of how orchids work.

Understanding Orchid Roots

The vast majority of orchids grown in the home are epiphytes, meaning they live in nature by clinging to trees or even stones. The roots of these plants are highly specialized organs that differ dramatically from normal plant roots. Of course, it's hard to generalize about anything when it comes to orchids. This is the single largest group of plants in the world, so for every rule there are 100 exceptions. For the rest of this article, I'm going to focus on epiphytic, tropical orchids. In general, it's best to follow the guidelines for each species when it comes to individual watering practices.
Orchid roots are surrounded by a tissue-paper thin membrane called velamen. This multipurpose membrane soaks up large amounts of water quickly, adheres to rough surfaces, and promotes the exchange of minerals and salts. Like an expensive water meter, orchid velamen is an excellent indicator of your plant's water needs. Dry velamen is white or silvery, and freshly watered velamen is green or mottled (depending on the species).
Learning to read your orchid roots is the best method to getting watering right. Remember: most orchids would rather being slightly underwatered than overwatered. Orchid roots that are kept constantly wet will rot, and the plant will decline.

Common Watering Mistakes

Orchids are tropical plants, right? So they like lots of water, right?
Sort of. Many popular orchids are tropical plants, but they are tropical plants that live in trees. In their natural habitat, they are exposed to drenching rains that may last hours or even days, but many species are also adapted to a dry period where little rain might fall for weeks.
When growing orchids in your home, it's highly unlikely you're duplicating the canopy environment of a tropical forest, with the right air flow, humidity, and light levels. So, keeping this in mind, here are the most common mistakes people make when watering orchids:
  • Watering too often. Orchid plants should never be allowed to sit in still water. In many cases, the plant should completely dry between waterings.
  • Watering at night. No matter what kind of orchid you grow, always water in the morning. Always. Nighttime watering allows water to stagnate in the growing tips of phalaenopsis or the flower sheaths of cattleyas. This encourages bacterial and fungal diseases. Orchid plants should be absolutely dry heading into night.
  • Ignoring the plant's cues. Orchids are pretty good about telling you what they need. During the growing season, pseudobulbs should be fat and plump, and fleshy leaves should be held up off the potting media and thick. Some deciduous orchids might shrivel during the winter. This is fine. Know what you're growing.

Watering the Right Way

As I've mentioned, it's hard to generalize. It's always best to follow the rules for your particular plant. There are, however, some best-practices that will greatly increase your chances of success.
Water thoroughly. When you do water, do it like you mean it. Different growers have different rules, but many professional growers turn on their sprinklers for 8 or more minutes. Successful home-growers sometimes dunk their plants, pots and all, into a bucket or sink of water. Some varieties, such as vandas, can be left floating in water for a surprisingly long time. The idea is to make sure the velamen is completely saturated. You want tiny droplets hanging on the roots after watering. This means the plant is completely hydrated.
Check your water. For a long time, serious growers insisted that orchids could only be watered with rain water. Nowadays, most people just use tap water, and this is fine. I've been using tap water for almost 10 years with no problem. However, be aware that treated water may have higher salt content, and some water is high in calcium. If you see deposits forming on your plants, you should seek out a new water source.
When in doubt, don't. I know this sounds odd, but if you're not sure if you should water your orchid or not, hold off. Again, there are some species this won't work for, for instance, paphiopedilum and phragmipedium. By the time they look thirsty, they should have been watered yesterday. But most potted epiphytic orchids would rather be on the dry side than overwatered.

Factors that affect watering

If only there was some easy guide, or a little water fairy that hovered over your plants and told you exactly when and how much to water. Unfortunately, there isn't. But I think this is one of the satisfying reasons we grow orchids. It's all about balance and instinct—and plenty of patience. Here are some of the factors you need to consider when developing a watering schedule:
  • Potting media. Different potting media retain different amounts of water. Pine bark nuggets will hold a water longer than charcoal or clay pellets. The greater the water retention, the less you need to water. Mounted plants will need more water.
  • Species. Make sure you are familiar with your particular species and following its rules. Different orchids can have very different watering requirements, and it can be very challenging to have a mixed collection without overwatering or underwatering at least some of your plants. I'd start with just one or two favorite varieties.
  • Temperature. The higher the temperature, the greater the need for water, in general.
  • Humidity. In general, the greater the ambient humidity, the less need for watering. Humidity is closely related to what kind of potting media you are using. Many home-growers keep their pots in a tray of pebbles filled with water to increase local humidity.
  • Air flow. Don't be afraid of a little air flow. Orchids like plenty of fresh air, both around the roots (for mounted plants) and leaves. But greater air flow tends to dry them out quicker, so you'll need to increase watering.

Shopping for Orchids

Buying an orchid can be as easy as picking up a plant on an impulse or as complicated as scouring specialty growers and websites for a rare specimen. In either case, it's a good idea to take a few steps to guarantee you're getting the healthiest plant possible, one that will hopefully survive long past its first bloom at home.

To Bloom or Not to Bloom

This is a good question. Most people like to buy blooming orchids because of the instant gratification that comes with bringing home such a beautiful plant. The orchid can be set out on the table and enjoyed immediately.
From an orchid's point of view, however, buying a blooming plant is less than ideal. Flowering takes a tremendous amount of energy for the orchid plant. Many experienced growers know that phalaenopsis in particular can bloom themselves to death, meaning they will have spectacular blooms for a few years in a row, then just fade and die.
So to answer the question “to bloom or not to bloom,” you have to consider your intentions. If you want to maximize the plant's chances of living and adapting to your growing conditions, it's best to buy plants that are not in bloom. But if you just can't resist the display of blooming orchids at your garden center, go ahead. Just try to pick one with lots of unopened buds so you can enjoy the bloom longer.

Picking Your Orchid

Picking a healthy orchid is a good idea even if the plant is meant as a gift or just a tabletop display. You want one with nice flowers, but there are other, more important factors to consider:
  • The wiggle factor. Gently grab the plant near the potting media and wiggle it a little. Epiphytic orchids (including dendrobium, cattleya, phalaenopsis, oncidium, and brassavola) are usually potted in a coarse mixture of bark nuggets, charcoal, styrofoam, and other inorganic and organic material. If the roots haven't firmly affixed themselves to the pot, you can gently lift the orchid from its pot and carefully inspect them. If it's firmly affixed to the pot, don't tear it out. You don't want to damage the roots. It's OK if a few roots are poking out of the top of the pot. If the orchid is potted inappropriately, but healthy, you can still buy it as long as you repot it at the first practical moment.
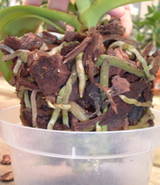
  • Healthy roots. The roots are the most important part of the orchid plant. Orchid roots are highly specialized organs that rapidly collect water and even perform photosynthesis. If the case of epiphytic orchids, they are designed to cling onto rough surfaces and anchor the plant high above the forest floor. A healthy orchid's roots will be light green when dry and dark green when wet. There should be a long, pointed and shiny green growing tip. The longer the growing tip, the healthier the plant. Dead orchid roots are shriveled and tan when wet and white when dry. A plant with dead roots will not survive.
  • Look at the leaves. This is a difficult topic to address because there is so much variation among orchids. Some have thin, pencil-like leaves, while others have fleshy, flat leaves. Some, like the ghost orchid, have no leaves at all and look like a small tangle of roots. In general, however, you should look for leaves that are thick, lightly colored and hard. The leaves should be slightly yellow-green, almost like a green apple. Leaves that are too glossy green mean the plant has likely been overfed and it will not bloom as well. The leaves should also be free from bugs, obvious blemishes and mushy spots. Finally, make sure the growing point is not destroyed.
  • Check the bulbs.There are basically two kinds of epiphytic orchids: those that grow from a single growing point (phalaenopsis, for example) and those that grow from a creeping rhizome (cattleya, for example). The plants with a single stem are called monopodial, while the plants with a creeping rhizome are called sympodial. Sympodial orchids send up a fresh bulb, or pseudobulb, every year with new leaves and blooms. If you're buying this kind of orchid, make sure the pseudobulbs are plump and fat.
  • Count the blooms. If you're buying a plant in flower, resist the urge to buy a plant with all of its blooms already opened. Long-lasting orchid blooms might last for a month or more, but if you buy a plant with unopened blooms, you'll enjoy the overall show for longer. Do not buy plants with yellow or shriveled blooms, however, as these will most likely fall off.
  • Get a name. This might sound unnecessary, but it's a good idea to make sure your orchid has a tag with a full name on it whenever possible. Don't buy plants labeled as "ORCHID" or "FLOWERING ORCHID." It's better to buy a plant with the full species or hybrid name whenever possible. This will allow you to learn more about that particular plant, and if you decide to start a collection, it's always nice to know what you're growing.

Acclimating Your Orchid

It's fine to display your new orchid on the table for a week or so when you first get it home, especially if it's in bloom. But keep in mind that no orchid will survive for long on a dining room table. Also, remember that the plant will be in shock when it first gets home. Orchids do not like to be moved, especially when they're in flower. You're most likely to lose unopened buds right when you take the plant home.
Ideally, the first few days in your home should be gentle ones. Do not expose the plant to direct sunlight, cold drafts or downdrafts from your vents, or get carried away with watering. This is counterintuitive to many people, but it's usually better to let an orchid dry out somewhat than drown. These plants like high humidity and regular moisture, but they have a limited tolerance for constant exposure to water, which can cause black rot and kill the plant.
When you're ready to move the plant from its display location, follow the tips specific to each species.

Growing Indoor Orchids


To grow an orchid, you have to think like an orchid.
The golden rule for orchid success is to duplicate the plant's natural conditions as closely as possible. In nature, most orchids are epiphytes, meaning they grow on other objects, clinging to rough bark or even stone. The showy orchids favored by most people are usually either phalaenopsis hybrids (so-called moth orchids) or dendrobium hybrids.

These plants thrive in these conditions:
  • Strong light, but not direct late-afternoon sunlight (although dendrobiums can handle more sun)
  • High humidity
  • Turbulent air flow around the roots
  • Regular periods of drying, alternating with drenching rains
  • Temperatures between 50 degrees and about 85 degrees
The closer you can come to creating these conditions in your growing area, the more success and better blooms you will have.
Most store-bought orchids come packaged in cheap plastic pots with the roots packed in soaked moss. Obviously, this violates two of the main rules of successful growth. There is no air flow around the roots, and the roots are never given a chance to completely dry out. Thus, the plant cannot breathe and root rot is inevitable. Orchid roots are highly specialized organs designed to soak up water very quickly and breathe. They do not extract nutrients from soil.

Repotting for Success

The first step with any store-bought orchid is to enjoy the bloom. Don't attempt to repot a flowering plant.
After the bloom is done, go ahead and cut off the dead flower spike with sterile snippers and repot the plant. Orchids should be potted into specialized orchid pots in orchid mixture. Orchid pots feature wide drainage slits so water will literally run through the pot. They are widely available. Orchid potting mixture is usually composed of several chunky ingredients, including pine bark, charcoal, and even styrofoam.
To repot your orchid, follow these steps:
  1. Remove it from the plastic pot and carefully remove as much of the moss as you can. Healthy roots should be white and firm, with a small green growing point.
  2. Cut away any shriveled, rotten or blackened roots.
  3. Set the plant into the pot and fill in around it with potting mixture. The plant should be firmly situated, but it will not be completely anchored. Eventually, new roots will grow through the potting mixture and attach to the pot itself, thus anchoring your plant.
Once it's repotted, find a good spot. An east facing window with a few hours of mild morning sun is perfect. To provide the necessary humidity and catch run-off water, put the plant into a wide, deep tray and fill the tray with gravel.

Tips for Care

Caring for your orchid is pretty simple. During the summer months, water it weekly and heavily. Let the water drench the roots and fill up the pebble tray (this will provide extra humidity). It doesn't hurt every so often to even put the plant in the kitchen sink and really soak it down. Don't worry, you won't kill it as long as it's allowed to dry out afterward. During the growing season, feed it weekly with a weak solution of a powder or liquid fertilizer. Many growers use Peter’s 20/20/20 fertilizer at quarter strength.
In the winter, keep your plant warm and cut the water back to once a month or so. Mist it every so often to make sure it stays hydrated. Don't fertilize it.

If you see signs of distress, such as yellowing leaves, wrinkled leaves or no blooms, move the plant and keep tweaking your conditions. Once an orchid finds a happy spot, and falls into a routine, the plant should regularly throw out new roots and leaves or canes (depending on the type) and reward you yearly with a beautiful bloom.